


Nothing feels better than peeling the plastic off a brand-new device and seeing that clean display. We all have faced the moment you try to apply a screen protector, the dust shows up uninvited. You apply the protector, and tiny particles sneak in to create annoying bubbles that ruin the perfect look. No matter how careful you are, it’s always a battle between your patience and the dust.
So, this guide will discuss a few hacks and techniques that will help you install screen protectors without getting bubbles under the new screen. I can assure you that with the techniques shared in the article, you won’t find it hard to install screen protectors.
Why Dust is Your Worst Enemy – And How to Beat It
What can I say? Dust is everywhere, and when it sticks to your screen, it can make installation a real challenge. When even a small amount of dust gets trapped under the protector, it creates air pockets and makes your screen look uneven. These bubbles can weaken the protector and cause peeling or lifting at the edges over time.

The worst part? Once the protector is on, removing dust means starting all over again. Since dust always floats in the air, it can be tough to avoid it completely. Well, this won't be a problem once you review the tips we've shared in the following sections.
Tips for How to Avoid Dust When Installing a Screen Protector
To avoid getting bubbles under your screen, go through the tips below:
Hack 1. The Steam Trick – Create a Dust-Free Zone in Minutes
Before you laugh it off, remember that a little steam can go a long way in keeping dust away from your screen. While applying the protector, turn on a hot shower and let the bathroom fill with steam. The moisture in the air helps trap dust and won't allow it to sit on your screen. Once the room is steamy, quickly move to a dry spot and apply the protector.
Hack 2. Tape It Right – The Secret to Lifting Dust Without Residue
Many times, no matter how careful you are, dust still finds its way onto the screen. So, instead of peeling the protector off completely, use a piece of sticky tape to lift the dust. I usually try this method by gently pressing the tape onto the dust and lifting it off. Just ensure using clean tape, and don't press too hard to avoid adding fingerprints or smudges to your screen.

Hack 3. The Card Method – Perfect Alignment Every Time
In addition to keeping the dust away, getting the perfect alignment is just as important. A simple way to do this is using a credit card or any firm plastic card. Start by applying the protector from one edge and use the card to slowly press it down while smoothing out bubbles. This technique helps push out trapped air and dust while keeping the protector in place.

Hack 4. The Bathroom Trick – Humidity is Your Best Friend
Do you know what else helps in trapping the dust in addition to steam? Yes, humidity! That’s why I keep suggesting people apply protectors on their screens in the bathroom. The higher moisture level in the air makes it much easier to get a perfect, dust-free installation. Just be sure to avoid getting the screen wet before applying the protector, or you will be dealing with new problems.
Hack 5. The Final Touch – Dust-Proof Your Screen Protector for Good
As a protective measure, you can use a soft cloth to wipe the surface gently every day as it prevents dust buildup. Also, I'd say avoid using paper towels or rough fabrics, as they can create scratches on the screen.

But we know it is a hassle to do all these things to avoid getting bubbles. That’s why at ESR, we provide 3 amazing techniques for apply iPad screen protection.
Part 3. Free Your Hand with ESR iPad Screen Protector Installation
You can easily avoid the troubles of following strict protocols to install your protector using ESR’s amazing installation techniques. Here, you get the following three useful methods that help you install protectors on your iPad screen without any bubbles or dust:
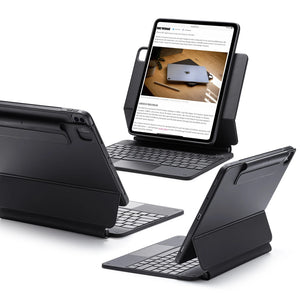
1. UltraFit Tray
· The installation tray follows a two-step process to complete the process.
· Since it also comes with a dust removal strip, no bubbles will appear on your screen.
· The process is totally safe, as all you need to do is pull out the strip after placing the device face-down.
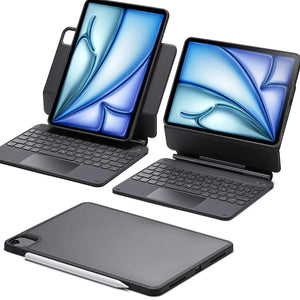
2. Alignment Frame
· It offers easy installation of a screen protector by positioning it with precision.
· The frame is built according to the dimensions of your iPad for perfect fitting.
· Due to its precision and simple installation, the process goes dust and bubble-free.
3. Application Tray
· Application Tray is made specifically for the device model to ensure the perfect fitting.
· The installation is extremely safe and involves pressing and sliding on the screen to finish the process.
· As it involves no use of hands in the process, it ensures no stains or dust on the screen.
How to Install a Tempered Glass Screen Protector with Application Tray (Complete Guide)
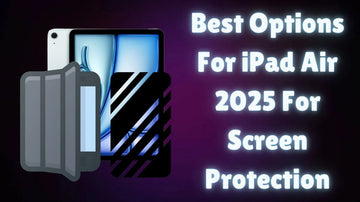
You might think the process of installing a glass protector on an iPad is difficult due to its big screen size. Well, ESR is here to prove this theory wrong with its Tempered Glass screen protector for iPad Air that comes with an Application Tray:
Instructions. Place your device in the tray after cleaning it with the cleaning kit that comes with the protector. Afterward, swipe on the screen protector after removing its adhesive paper and press down on the allocated space on the application kit to complete the process.

Part 5. How to Install an Armorite Screen Protector with UltraFit Tray (Complete Guide)
To be honest, this tray makes the process even easier and safer by ensuring no air bubbles remain on the screen. Here is how you can use this Armorite Screen Protector with UltraFit Tray on your iPad A16 2025:
Instructions. Commence by placing your tablet in the tray with its camera side up. Before that, make sure to clean the screen using the cleaning kit that comes with it. Now, hold your hand firmly on your device and pull out the tab to start installing it cleanly.

Part 6. How to Install a Paper-Feel Tempered Glass Screen Protector with Alignment Frame (Complete Guide)
The Alignment Frame is another exclusive accessory that comes with the iPad Air 13-inch Paper Screen Protector. Let me tell you, using this installation kit is very easy and equally fun:
Instructions. Simply place your iPad in the alignment frame with its screen side up and slowly drop the protector. Afterward, use a card or cloth to remove the bubbles and peel off the protective adhesive.

ESR Your Tech With the Right Materials
As you can see, it is extremely important to use ESR's useful gadgets to install screen protectors on your iPads. This guide has helped you discover the right techniques that helps you avoid bubbles and dust on your screen. Due to their quick, simple installation process, you can also apply them at your home. So, get your protectors from us using the blog20 code today to save big bucks and protect your device.